Tihomir Habjanec, Tea Bratic
DATA ENGINEERS
In the first part of our blog we focused on data ingestion from a publicly available API, orchestration and monitoring. Now, let us look at our Azure Functions for processing data. We will first give a brief overview of what Azure Functions are, how to use and deploy them to Azure. They are a serverless solution that allows you to focus purely on writing code. Instead of worrying about deploying and maintenance, Azure provides all the up-to-date resources needed to make your app run. We will prepare and deploy two functions for fetching and aggregating data from our REST API source.
Azure Function App – Overview
A function is a (org. primary) fundamental concept in Azure Functions. A function contains two main parts – code, which can be written in a variety of languages (in time of writing, supported-generally available languages are: C#, JavaScript, F#, Java, PowerShell, and Python), and a config, the “function.json” file.
A function app provides an execution context in Azure in which functions run. As such, it is a unit of deployment and management for functions. A function app consists of one or more individual functions that are managed, deployed, and scaled together. All functions in the function app share the same pricing plan, deployment method and runtime version.
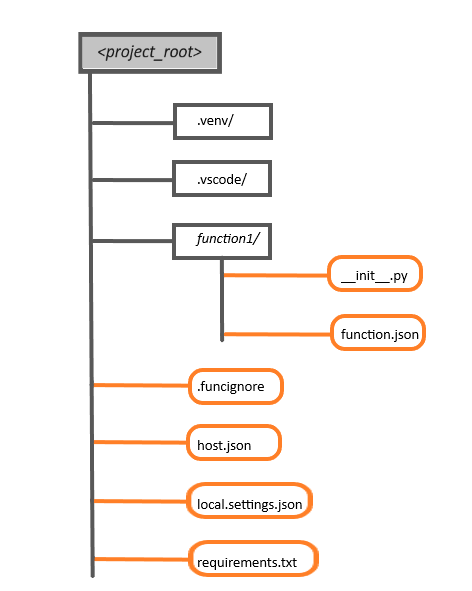
The recommended folder structure for a Python Functions project looks like the following example:
The main project folder (<project_root>) can contain the following files:
.venv/: (Optional) Contains a Python virtual environment used by local development.
.vscode/: (Optional) Contains store VSCode configuration. To learn more, see VSCode setting
.funcignore: (Optional) Declares files that should not get published to Azure. Usually, this file contains .vscode/ to ignore your editor setting, .venv/ to ignore local Python virtual environment, and local.settings.json to prevent local app settings being published.
host.json: Contains global configuration options that affect all functions in a function app. This file does get published to Azure. Not all options are supported when running locally. To learn more, see host.json.
local.settings.json: Used to store app settings and connection strings when running locally. This file does not get published to Azure. To learn more, see local.settings.file.
requirements.txt: Contains the list of Python packages the system installs when publishing to Azure.
Each function has its own code file and binding configuration file (“function.json”).
When deploying a project to a function app in Azure, the entire contents of the main project (<project_root>) folder should be included in the package, but not the folder itself, which means “host.json” should be in the package root.
As mentions before, Azure Functions expects a function to be a stateless method in a Python script that processes input and produces output. By default, the runtime expects the method to be implemented as a global method called main() in the “__init__.py” file. Also, there is an option to specify an alternate entry point.
Function App project via VSC
We are going to demonstrate how to create, deploy and update an Azure Function by using Visual Studio Code (VSC). VSC supports local debugging and automatic deployment (no need for shell scripts), therefore VSC is recommended for beginners.
Prerequisites
- Azure subscription
- Visual Studio Code
- Python extension
Installation
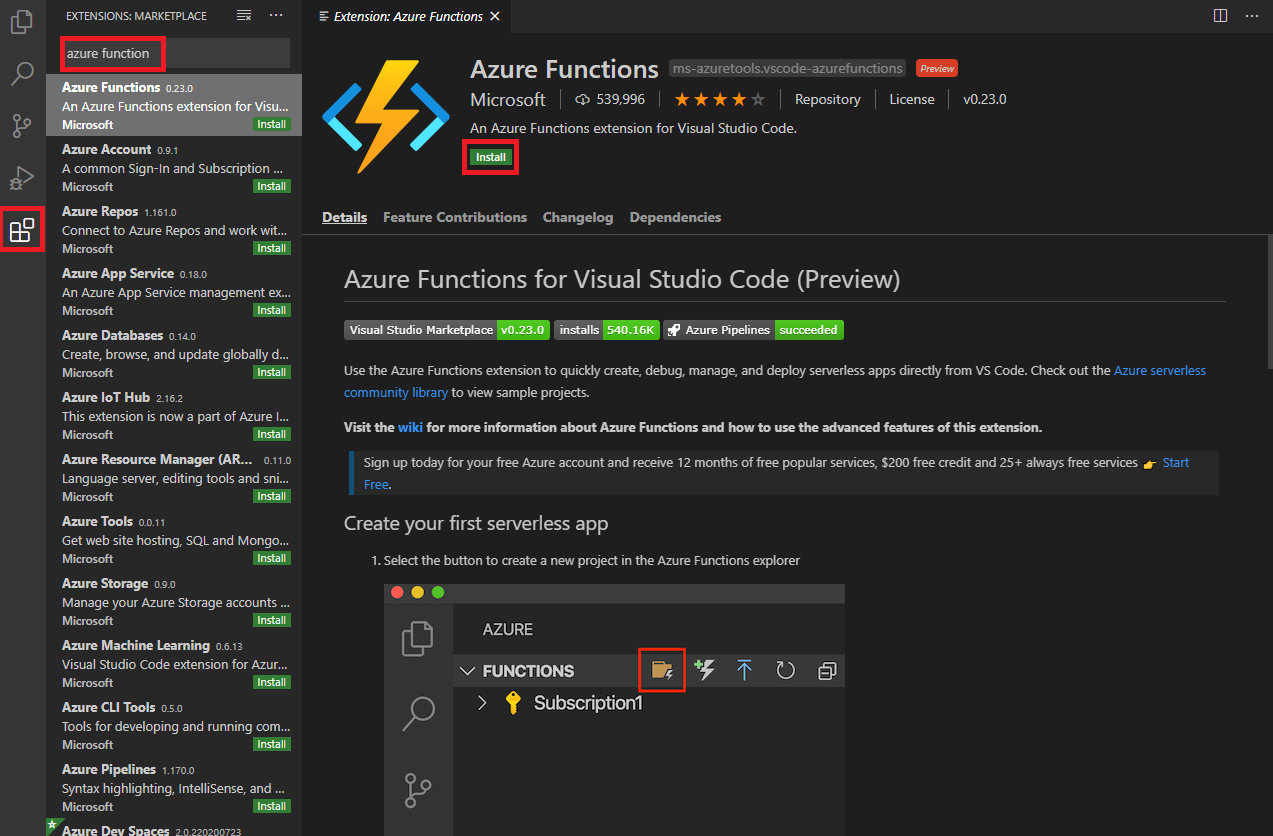
To initialize a project as Azure function VSC will be used; therefore, it is necessary to install the extension for Azure Function.
Once the Azure extension is installed, sign into Azure account by navigating to the Azure explorer, select “Sign into Azure”, and follow the prompts. The final step of installations is the AZURE FUNCTION CORE.
Creating Azure Function App
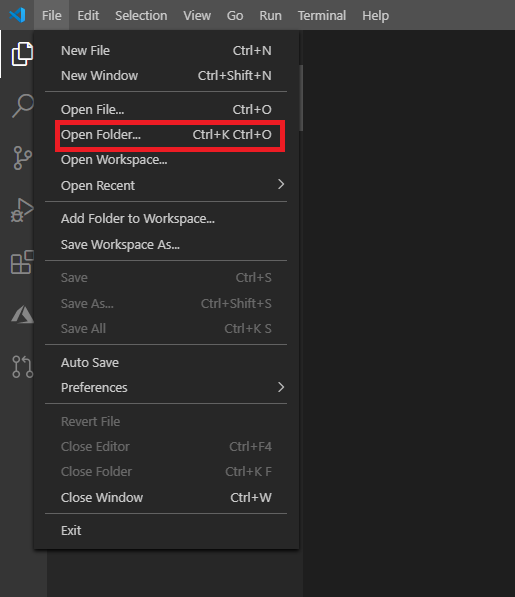
We will create an Azure Function App by using the previously installed extension. Azure functions will be set to a HTTP trigger and invoked via HTTP requests to build serverless APIs and respond to webhooks. To start, create a folder for a project. Open the folder in VSC.
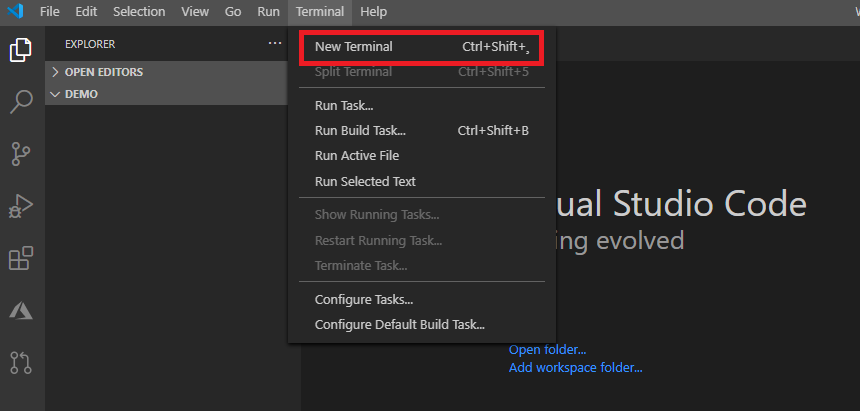
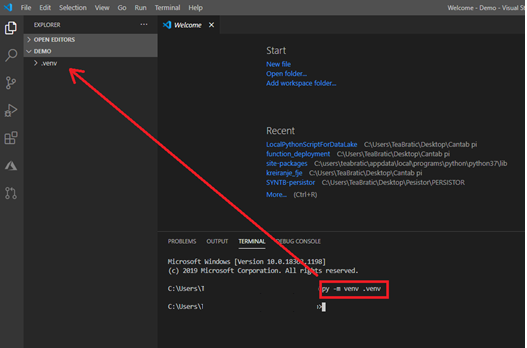
We are going to develop in a virtual environment, to do so open the terminal and input the command:
py -m venv .venv
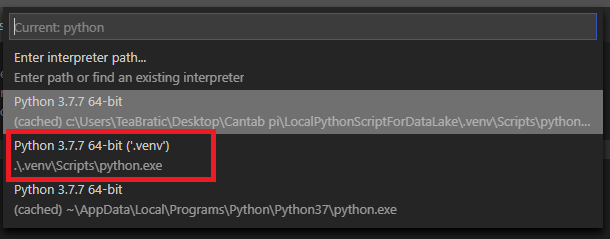
To select a virtual environment, use the Python: Select Interpreter command from the Command Palette (Ctrl+Shift+P).
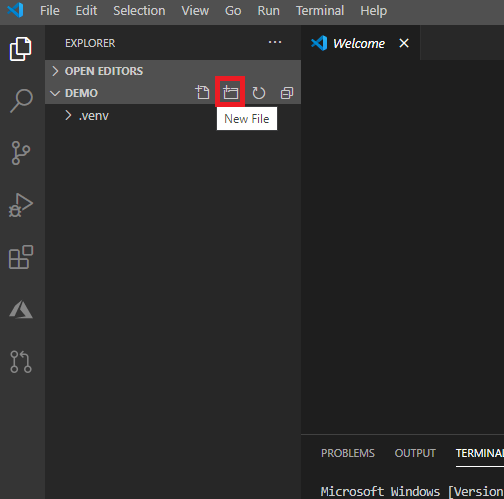
To be recognized as an Azure Function App, the project requires a specific structure. We need to create host.json, local.settings.json, requirements.txt, .funcignore
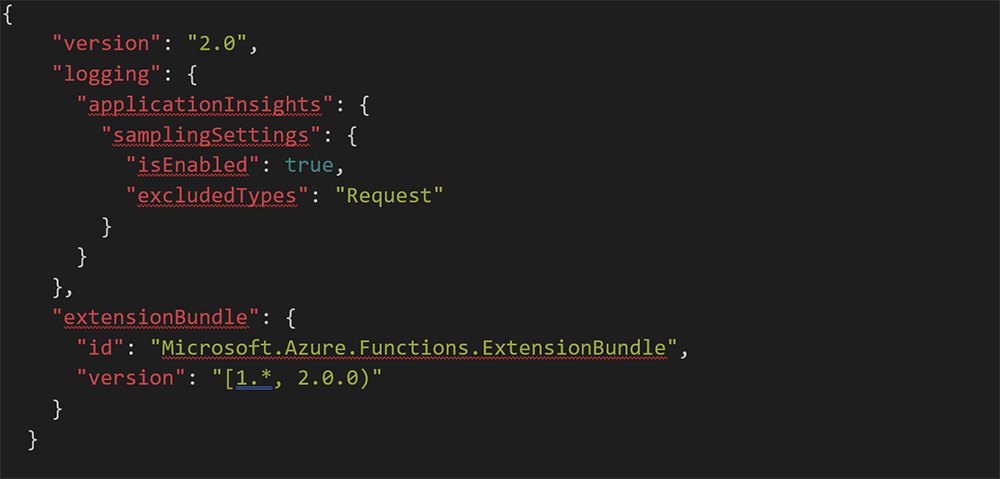
The host.json metadata file contains global configuration options that affect all functions for a function app.
1 host.json
The local.settings.json file stores app settings, connection strings, and settings used by local development tools. Settings in the local.settings.json file are used only when the project is running locally.
2 local.settings.json
The requirements.txt file contains the names and versions of the required packages. The following command to install requirements in the virtual env by using pip is:
pip install -r requirements.txt
3 requirements.txt
Next, create a new folder. The name of this folder will also be the name of the function.
To make this easier to understand, we will provide a sample of a simple http function. Later, we will upgrade this __init__.py with a more complex solution used for reading and storing to Data Lake.
4 __init__.py
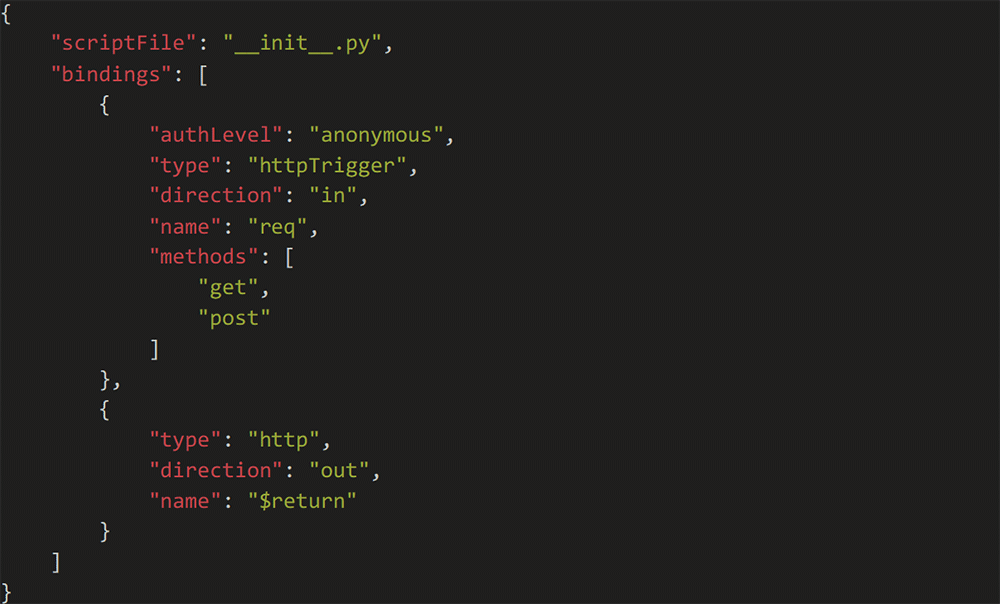
Each folder that contains a function.json will be recognized as a single function.
5 function.json
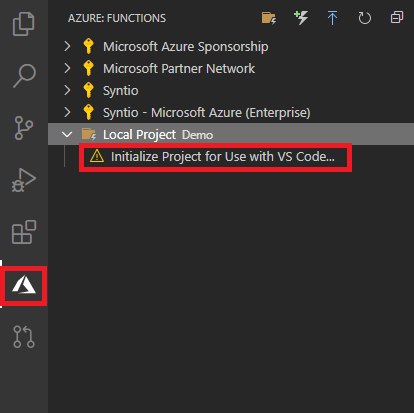
To initialize this project as Azure Function App, on Azure tab select the project
Debugging
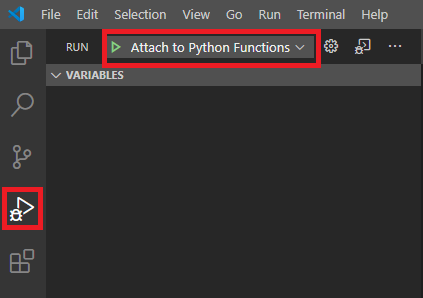
To test the function, open the Run tab and run the function.
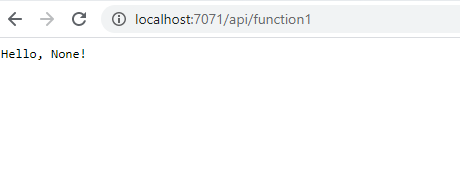
After successfully running the code, URL of function1 will be displayed.
By opening it in the browser you should see:
And with setting the parameter for user in URL:
Now you can disconnect.
Publishing the project to Azure
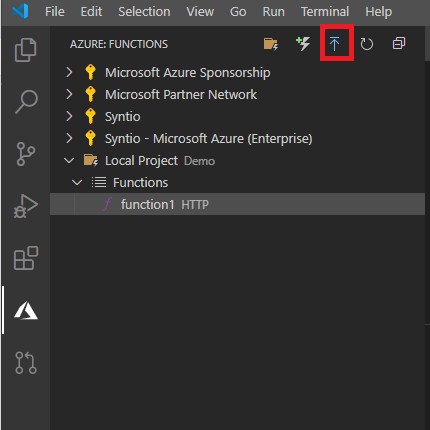
In VS Code open Function explorer by selecting Azure icon on the left side. Click on the deploy icon to deploy your function.
You can monitor the status of deployment in the bottom right corner.
After deployment is complete, you can check your function in Azure portal.
Extracting Data from Azure Data Lake Store
The purpose of this section is to demonstrate how to use Python SDK to perform filesystem operations on Azure Data Lake Storage Gen2 by using Azure Function.
To install the Azure Data Lake Storage client library, run.
pip install azure-storage-file-datalake
The entry point into the Azure Datalake is the DataLakeServiceClient which interacts with the service on a storage account level. It can be authenticated with an account and a storage key, SAS tokens or a service principal.
The account key will be used to connect to the storage account, as it is the easiest way to connect to an account. This example creates a DataLakeServiceClient instance by using an account key.
As you can see, we are missing some information. You can find it by accessing Azure portal, in “Settings/ Access keys” of Storage account, storage_account_name and storage_account_key.
A container acts as a file system for your files. A storage account can have many file systems (aka blob containers) to store data isolated from each other. The FileSystemClient represents interactions with the directories and folders within it.
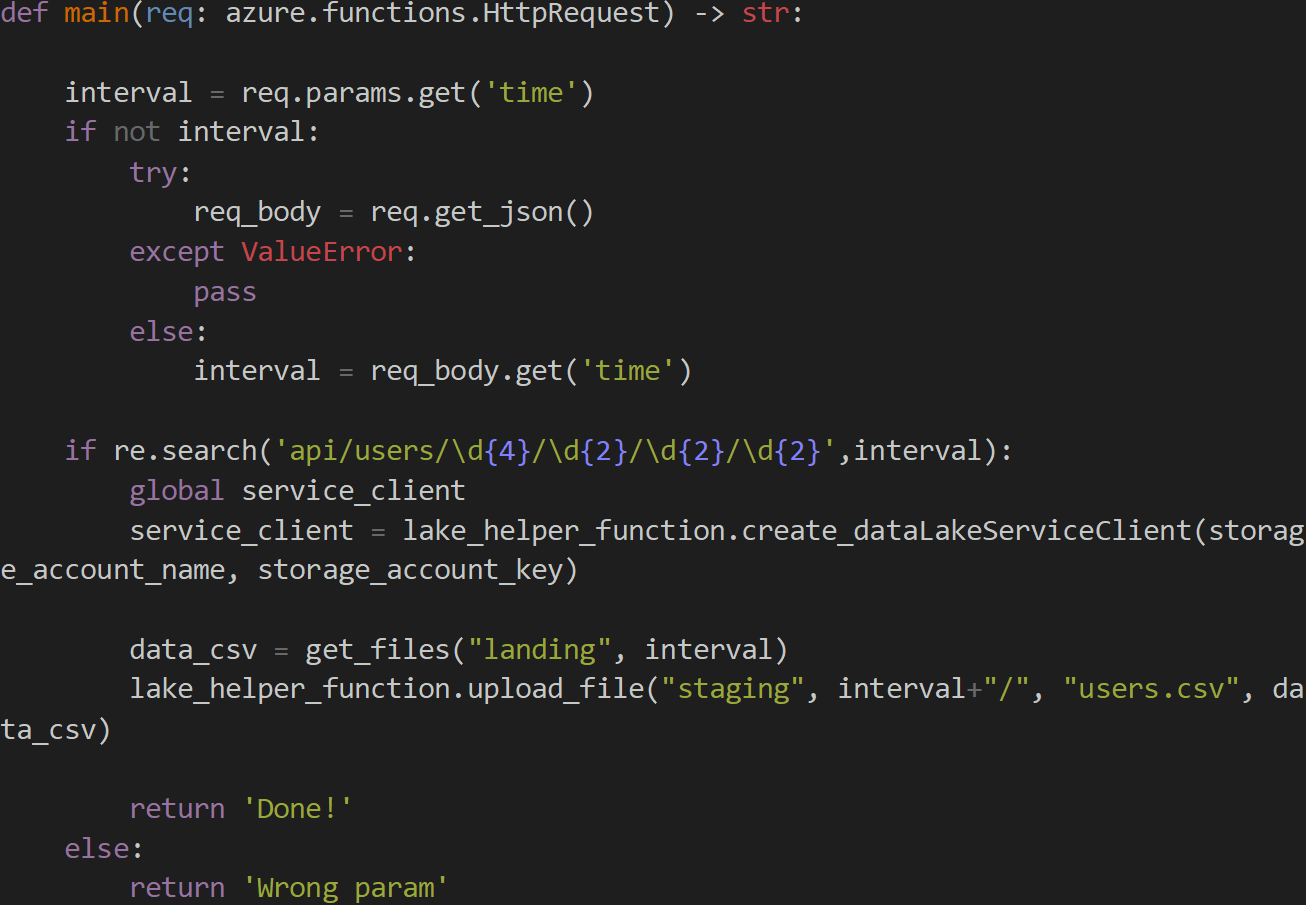
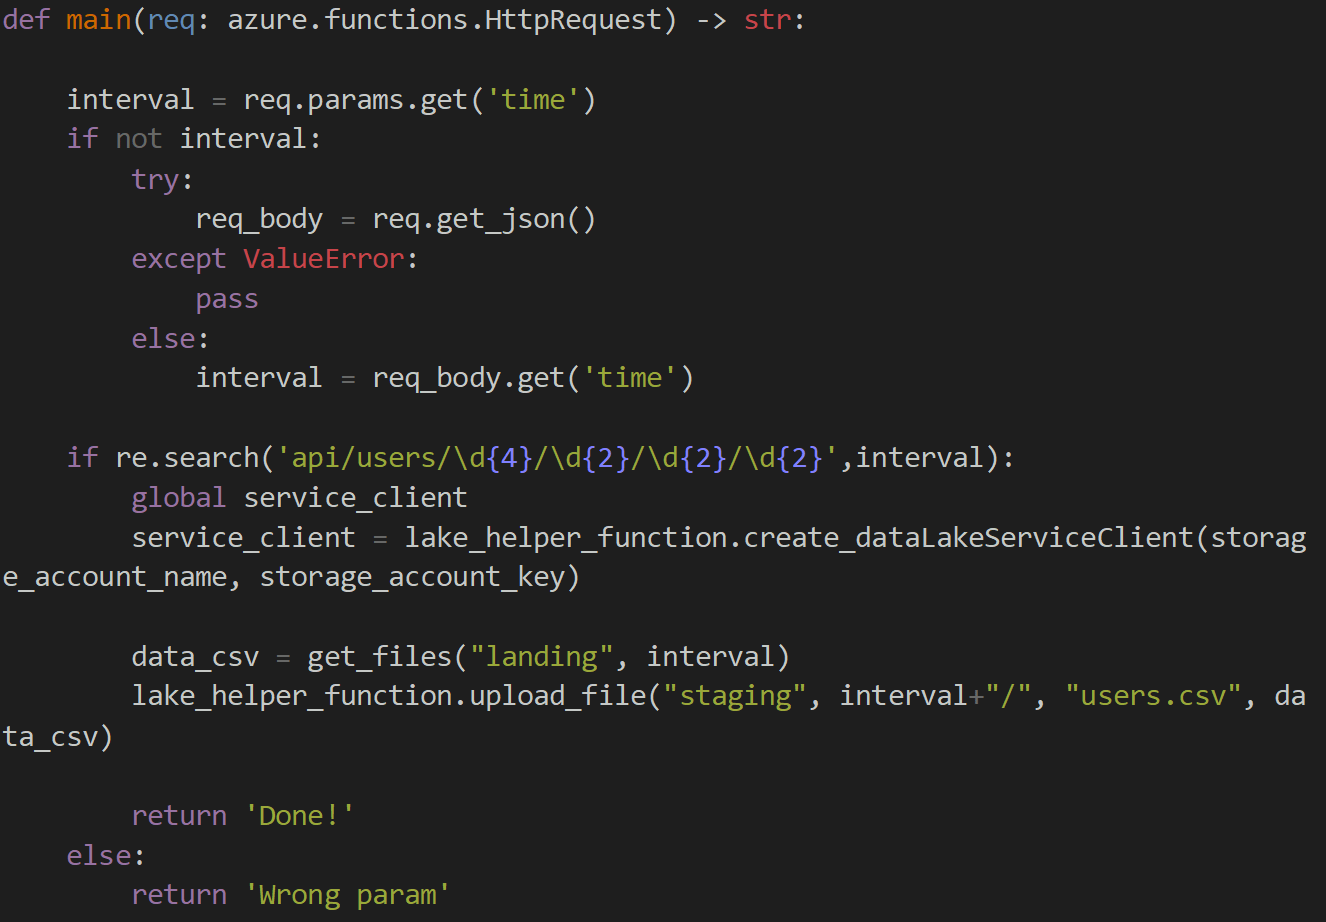
As shown before, there are two Azure Functions. The first function collects data from landing container every hour, stored as JSON and stores back data as CSV in Data Lake. The second one is triggered once per day, it downloads all CSV files, runs query on it and store result back in it.
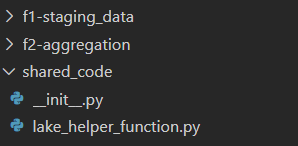
Furthermore, they will have the same part of code, such as creating clients and upload the files in Data Lake. Therefore, we are going to create a separate folder which contains shared code (placed in the root of the project).
6 shared code
Both functions are triggered by an HTTP request. In an HTTP GET request, parameters are sent as a query string.
A container acts as a file system for your files. A storage account can ha
7 f1-staging_data
Key Vault Secrets with Azure Functions
It is not advisable to store credentials where they are not protected, such as in your source code. To restrict access to secrets, it is preferable to Azure Key Vault; a cloud service for securely storing and accessing secrets. To read secrets from Key Vault, you must create a vault and have app permission to access it.
With this, we completed the setup of a whole pipeline for fetching, processing and storing data into Data Lake. The same process could be done in multiple ways; just using Azure Data Factory, only using Azure Functions, using Azure Batch or Azure Databricks… the possibilities are endless. It is only the question of picking the best tool for the job. You can solve the same problem with all of them, but some will be more expensive, some less, some will be faster some slower, and some will be more scalable will some will not.
A container acts as a file system for your files. A storage account can have many file systems (aka blob containers) to store data isolated from each other. The FileSystemClient represents interactions with the directories and folders within it.
Many thanks to Ivan Celikovic for his help and advice.
ve many file systems (aka blob containers) to store data isolated from each other. The FileSystemClient represents interactions with the directories and folders within it.

