Ena Dzanko
DATA ENGINEER
Kubernetes eliminates many of the manual processes regarding the deploying or scaling containerized applications.
Kubernetes is an open source platform that automates Linux container operations. It was developed by Google for clustering and scaling multiple Google services. Google hosts in containers Gmail, YouTube, Search engine – and every week redeploy over two billion containers.
Kubernetes eliminates many of the manual processes regarding the deploying or scaling containerized applications. In other words, you can cluster together groups of hosts running Linux containers, and Kubernetes helps you easily and efficiently manage those clusters. Because of it, Kubernetes is an ideal platform for hosting cloud applications that require rapid scaling, like real-time data streaming with Apache Kafka.
With Kubernetes you can:
- Orchestrate containers across multiple hosts.
- Make better use of hardware to maximize resources needed to run your enterprise apps.
- Control and automate application deployments and updates.
- Mount and add storage to run stateful apps.
- Scale containerized applications and their resources on the fly.
- Declaratively manage services, which guarantees the deployed applications are always running how you deployed them.
- Health-check and self-heal your apps with autoplacement, autorestart, autoreplication, and autoscaling.
In the setup we will have one master node and multiple worker nodes, which will be manageable from the master with the kubeadm and kubectl tools. The virtual machines are running on CentOS 7.5 and are deployed on Azure.
PREREQUISITES
The following steps must be done on all machines.
-
Update:
yum update
Host names configuration (not necessary, we do it for easier navigation trough the cluster):
hostname set-hostname <node_name>
-
Disable SELinux (security enhanced Linux):
This is a general recommendation so it doesn’t disturb the process. After the following command restart the machine and check that it executed correctly (command: sestatus or getenforce, should output “disabled”)
setenforce
sed -i --follow-symlinks 's/SELINUX=enforcing/SELINUX=disabled/g' /etc/sysconfig/selinux
-
Enable bridge_netfilter to enable pod communication across the cluster:
modprobe br_netfilter
echo 1 > /proc/sys/net/bridge/bridge-nf-call-iptables
echo 1 > /proc/sys/net/bridge/bridge-nf-call-ip6tables
-
Disable swap and edit the /etc/fstab file
so that swap stays disabled after REBOOT.DO this by commenting the part under “UUID”.
Comment: #/dev/mapper/VolGroup00-LogVol01 swap swap defaults 0 0
swapoff -a
DOCKER INSTALLATION
First check the docker version that is supported/validated by the latest kubernetes version.
-
Install packages (yum-utils, device mapper and lvm2)
yum install -y yum-utils device-mapper-persistent-data lvm2
-
Add the docker repository to the system
yum-config-manager --add-repo https://download.docker.com/linux/centos/docker-ce.repo
-
Install the docker
yum install -y docker-ce
-
Start the docker and check if its working
systemctl start docker
docker run hello-world
-
Add the docker to the service so that it starts whenever the machine starts
systemctl enable docker
KUBERNETES INSTALLATION
-
Add k8s repository to the system
cat <EOF /etc/yum.repos.d/kubernetes.repo
 [kubernetes]
 name=Kubernetes
 baseurl=https://packages.cloud.google.com/yum/repos/kubernetes-el7-x86_64
 enabled=1
 gpgcheck=1
 repo_gpgcheck=1
 gpgkey=https://packages.cloud.google.com/yum/doc/yum-key.gpg
 https://packages.cloud.google.com/yum/doc/rpm-package-key.gpg
 EOF
-
Install packages
yum install -y kubelet kubeadm kubectl
- Restart the machine
- Start services
systemctl start docker && systemctl enable dockersystemctl start kubelet && systemctl enable kubelet
-
Adjust Control groups
Make k8s and docker use the same group. Check the docker group with:
docker info | grep -i cgroup
The docker should be using “cgroupfs” as a group-driver. Change the k8s to the same one:
sed -i 's/cgroup-driver=systemd/cgroup-driver=cgroupfs/g' /etc/systemd/system/kubelet.service.d/10-kubeadm.conf
-
Reload and restart the following:
systemctl daemon-reload
systemctl restart kubelet
CLUSTER INITIALIZATION
-
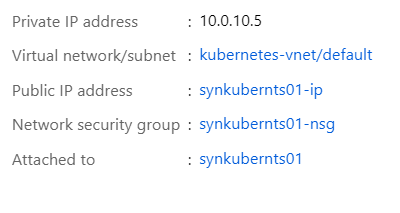
Find private IP addresses assigned to each machine and configure the /etc/hosts file by adding those addresses and DNS names (picture below).This must be done on all machines:
Path: Overview -> Virtual network/subnet -> Connected devices (find the one attached to that virtual machine and read its IP address)
-
Initialize the cluster on master node:
kubeadm init –apiserver-advertise-address=PRIVATE_IP_ADDRESS--pod-network-cidr=ADDRESS_SPACEexample: kubeadm init –apiserver-advertise-address=10.0.10.5–pod-network-cidr=10.0.10.0/24
Note: address space for that machine can also be read in Virtual network/subnet.
The output should be like in the following picture and you should get the token for later secure node join:
-
After initialization run the following commands as a regular user:
mkdir -p $HOME/.kube
sudo cp -i /etc/kubernetes/admin.conf $HOME/.kube/config
sudo chown $(id -u):$(id -g) $HOME/.kube/config
kubectl apply -fhttps://raw.githubusercontent.com/coreos/flannel/master/Documentation/kube-flannel.yml
-
Check Kubernetes nodes and pods:
kubectl get nodes
kubectl get pods –all-namespaces
CONNECTING CLUSTER NODES
-
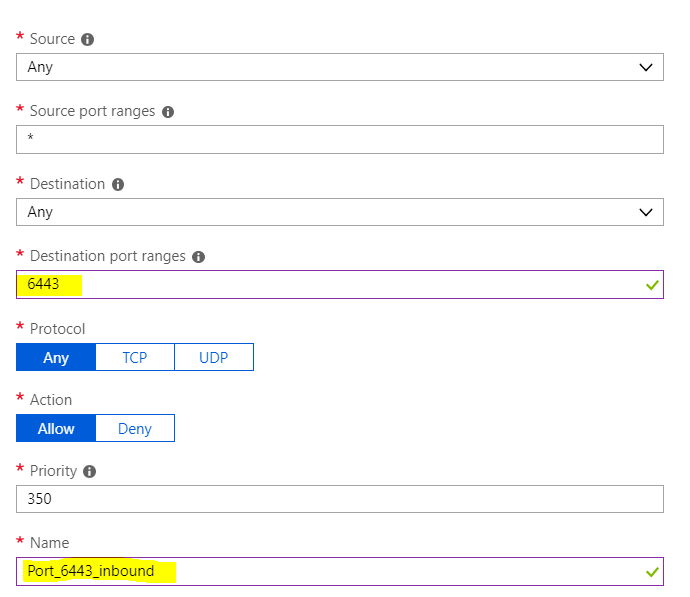
Add ports – in this case we will only be needing the Kubernetes default port (6443) as inbound and outbound port.Add it to all machines.
JOINING NODES
Join nodes to the master with the token you got after init with the following command and you should get the output:
kubeadm join :6443 --token <###>
- After joining you can check the nodes:
kubectl get nodes
CLUSTER REDEPLOYMENT
If you wish to reset the cluster deployment you need to run the following command on master and all of the cluster nodes.Have in mind that this does not delete configuration files (example .kube file) so you can do that manually.
kubeadm reset


