Dominik Kos
DATA ENGINEER
Introduction
A virtual machine, or a VM, is a virtualized instance of a computer that can perform almost all of the same functions as a computer, including running applications and operating systems. Considering that they are very powerful tools engineers can use, they have become an essential part of web services that cloud providers such as GCP, Azure, and AWS, nowadays offer.
More often than not, the code that gets placed in one of these VM instances requires some additional editing. Sometimes the application run on the VM instance experiences a behavior that cannot be easily explained and requires some additional debugging to understand, and fix the issue.
In the case of GCP, in order to make changes to the code, the engineer has to initially connect to the VM instance through SSH. After that, they get positioned in a terminal where they can then navigate to the required script where they believe the bug can be found, edit the script, and hopefully fix the issue.
That all seems pretty simple until you remember that initially, the only editors at your disposal when fixing these bugs are editors like GNU nano or the more popular Vim. Now those are great tools, especially Vim, which can automate your CI (read: Continuous Integration). The problem they face is that they are not as visually stimulating as an IDE, making you feel like you are coding in the simplest Text Editor, while in the case of Vim, it also has a very steep learning curve. All of this makes the process of fixing the bug a lot more complicated than it needs to be.
In light of that, I decided to search for a better way of editing files saved on a VM instance by connecting it to an existing IDE, to make tracking code changes easier, and to make debugging much more intuitive. It turns out that one of the IDEs I heavily use, Visual Studio Code, has an extension that enables exactly that, with just a simple setup, which is explained in the following article.
Prerequisites
Before the setup, the prerequisites need to be met, and those are:
- a downloaded and installed VS Code
- a working GCP account and project with a VM instance already set up and running
The links for both of these can be found below:
CREATING AND MANAGING PROJECTS | RESOURCE MANAGER DOCUMENTATION | GOOGLE CLOUD
CREATING AND STARTING A VM INSTANCE | COMPUTE ENGINE DOCUMENTATION | GOOGLE CLOUD
Setup
The first step in setting up the connection is to install the Remote – SSH extension in VS Code. Simply open VS Code, and on the left side in-between all the icons, click on the one that says Extensions. In the newly appeared search bar search for remote-ssh. Among the search results, click on the following extension:
Click Install, and it should appear as a new extension in VS Code in a matter of seconds.
Once that is done, move on to generating an SSH key. Now VS Code recommends an OpenSSH compatible SSH client. These can slightly vary depending on the operating system, as can be seen below:
The link to this instructional installation site can be found here: INSTALLING A SUPPORTED SSH CLIENT.
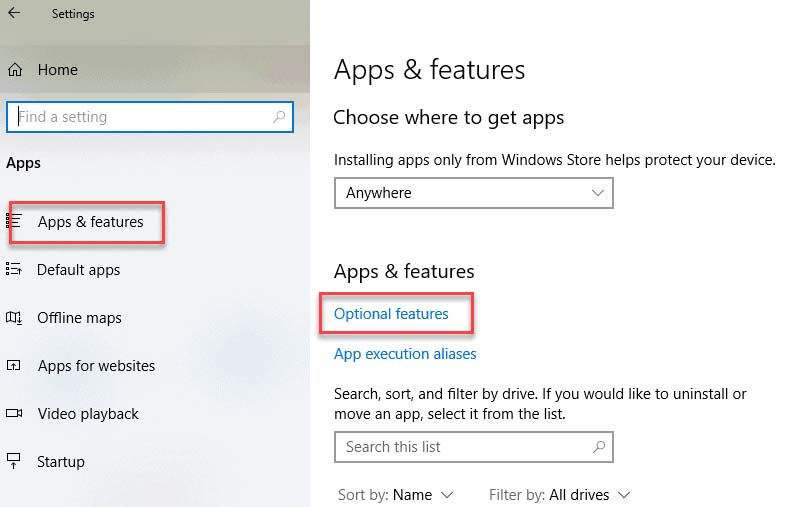
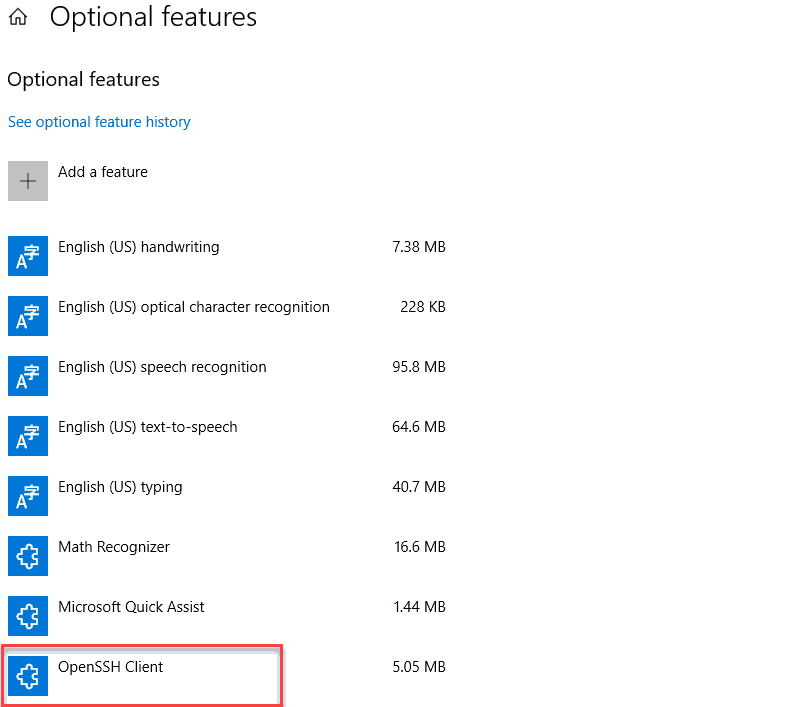
In my case, it already came preinstalled on Windows, but you can check that by going to Apps & features → Optional features → OpenSSH Client, as can be seen in the images below:
Once the client is installed, simply open the Terminal, and run the command ssh-keygen, which will then ask you where you want to save this newly generated SSH key, and to enter a passphrase. The result should look something like this:
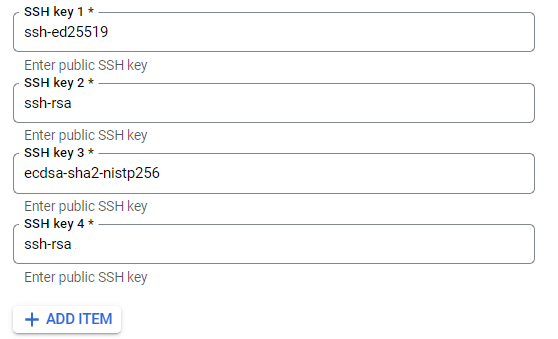
The next step is to open the newly generated public part of the key in an editor, preferably something like Notepad++ that can display the characters in the file correctly, copy it, and add it to our existing SSH keys in the VM instance on GCP. Simply click on the preferred VM instance, then click on Edit, and add a new line to the SSH keys section by clicking on Add Item and pasting the public part of the key, as can be seen in the following images:
Clicking on Save, should add a new user to the VM instance, with a username and a key as can be seen in the SSH keys section. This will be the user that VS Code is going to use to connect through SSH to the VM.
The last step of the setup is to add the Host, to which VS Code will connect, to the computers /.ssh/config file. In the case that the previously mentioned file does not exist on ones computer, one can be added by following the instructions on the following link: HOW TO SET UP AN SSH CONFIG-FILE FOR BEGINNERS.
The configuration for adding the Host to the config file can be seen on the following image:
With HostName being the external IP of the VM instance, User being the username of the newly added SSH key in the VM instance, IdentityFile being the path to the Private key of the SSH key on the local machine, and Host being the arbitrary name chosen for this particular host.
Once the previous steps are finished, simply open VS Code again, and click on the newly added green arrow-like button in the bottom left corner, which is shown in the image below:
Alternatively ,press Ctrl + Shift + M. Both of these will open a prompt window, where you will type in connect to host. This should find the service of the same name which can be seen in the image below:
Once you click on the service, a new prompt window will open, where you type in the following:
With the former being the username of the newly added SSH key in the VM instance, and the latter being the arbitrary name given to the host in the config file. Once these values are entered, a new VS Code window will open, and in a few seconds, you should be able to see something like this in the bottom left corner:
This prompt signifies that the connection is successful!
*The 34. will be different for you, displaying the host IP address of your VM instance.
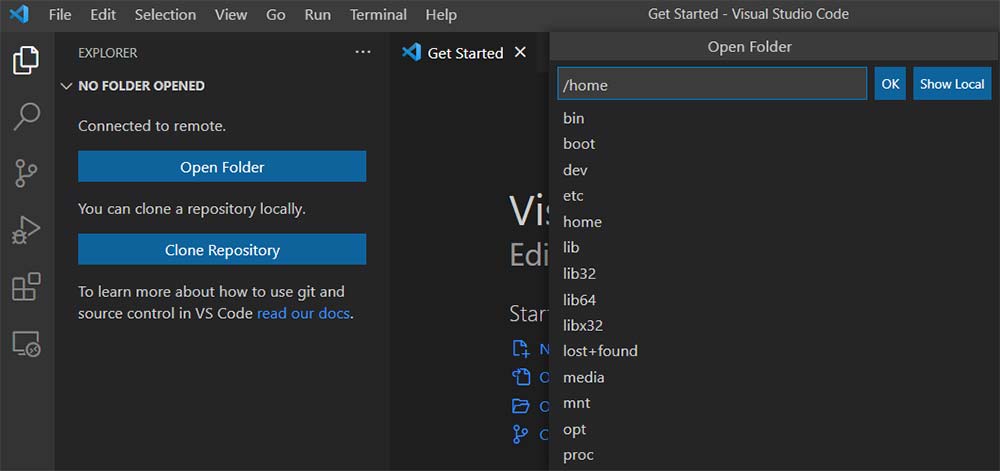
You can now easily go to the Explorer, and click on Open Folder to open any folder where the files on your VM instance might reside, as shown in the image below:


